Digitize Your Workflows in Under an Hour with Quantum RTLS™ 2.0
ZeroKey’s millimeter-accurate real-time positioning technology, Quantum RTLS, unlocks the ability to digitize end-to-end physical processes in the factory in a way that has been impossible in the past. If you’ve seen our demos before, you might be wondering: How can I replicate workflows like that in my environment? How long will it take, and what else do I need?
The answer is: It’s never been easier. Within an hour, we unboxed our hardware, set up positioning, and built and calibrated a real workflow at an assembly bench. Here’s how:
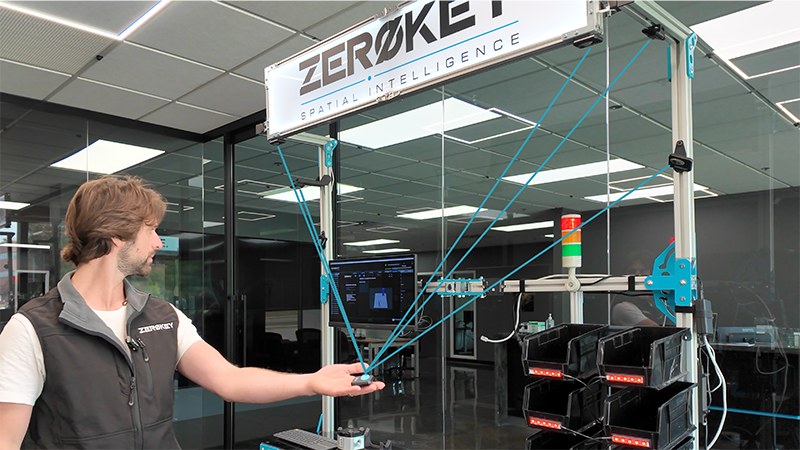
Begin by mounting Anchors to your assembly bench, station, or work cell using the mounts included in the ZeroKey Starter Kit. To achieve 1.5 mm positioning accuracy, the system relies on ultrasonic ranging, and the transducer of a Mobile (the black circular grill on the front of the device) should have clear sightlines to at least four Anchors. The system can handle interruptions to ultrasonic positioning, such as when reaching into a bin or a drawer, but it is important to consider Anchor placement around key areas where position accuracy is most critical. For our demo, we use six QTM-UAR10 Anchors mounted to extruded aluminum on the overhead structure of our bench.
Step 2: Gateway Setup
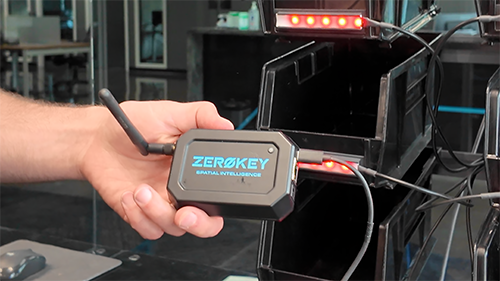
The QTM-AGP10 Gateway facilitates communication and scheduling for your Quantum RTLS system. Connect it to a PC via the included USB-C cable and launch the ZeroKey Config Tool (click herefor the ZeroKey SDK and Config Tool first-time setup guide).The Gateway will connect automatically. You will only need one Mobile for the calibration, so it’s important to make sure that any unused devices are turned off for this step. QTM-UAR10 Anchor and QTM-UMR10 Mobile devices are turned on and off by pressing and holding the gray button on the side of the devices.
Step 3: System Calibration
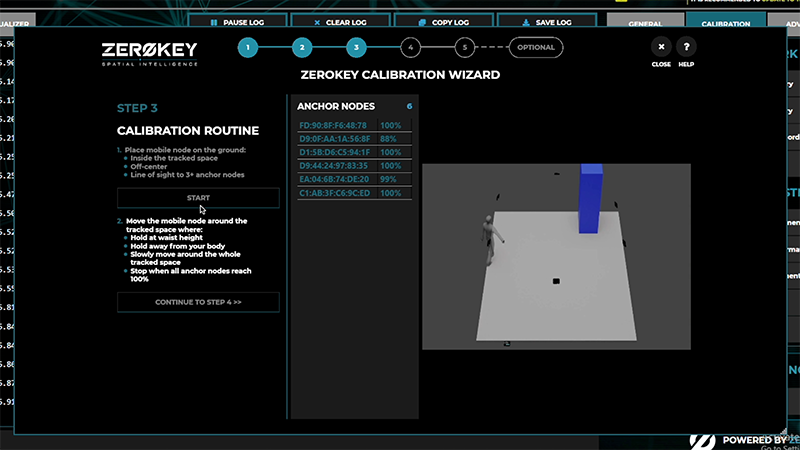
Launch the ZeroKey Calibration Wizard by clicking “Anchor Calibration” from the home screen of the Config Tool. Position the Mobile face-up on the bench and click “Begin Calibration”.Use the Node Discovery window to ensure only the installed Anchors and one Mobile device are detected. If additional devices are detected, power them down. When the correct number of devices is displayed, place the Mobile face-up in the palm of your hand and with your arm extended at chest height, move slowly throughout the space wherepositioning is required. As you move, the system gathers necessary measurements for calibration. Ensure there is a clear field of view from the Mobile to the Anchors during this process. When complete, the onscreen status bars will indicate 100% and an alarm will chime. Click the “Continue” button. The system will then process the data automatically and determine the location of the Anchors relative to each other. For a more detailed overview of the calibration process, visit the ZeroKey Info Center.
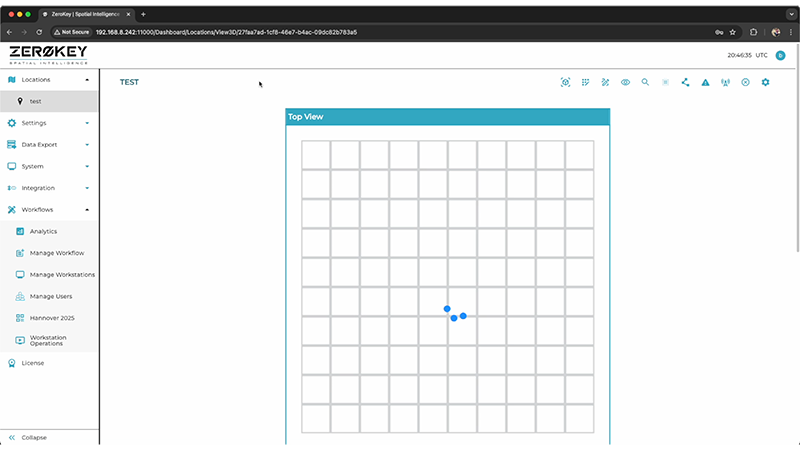
Step 4: Check Live Positioning
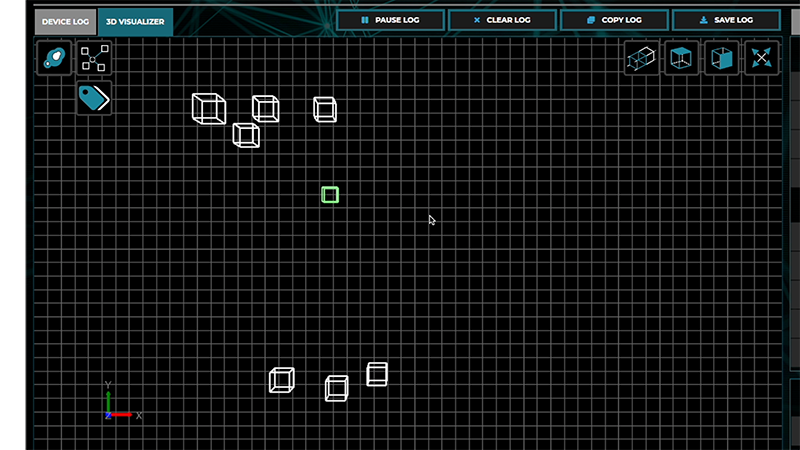
The system is now ready. Click“Launch 3D Visualizer” in the UTILITIES tab to start positioning. The Config Tool will load the 3D Visualizer, allowing you to view the real-time position of the Mobile and the static locations of the Anchors. Verify that positioning appears smooth across the areas where work will be completed.You can also perform a scale check to verify the accuracy of the system by launching the Distance Measurement Tool in the UTILITIES tab.
Step 5: Edge Compute Device (ECD) Setup
Power up your ZeroKey Edge Compute Device by plugging in the AC power supply, and connect the Gateway to it via the included USB-C cable. Access the Dashboard from a PC on the same network as the ECD (click here for more details about accessing your ECD’sDashboard). Sign in with your user credentials and navigate to the Location View to view the real-time positioning of your Mobile. As you power up additional Mobiles, they will automatically start positioning and appear in the Location View.
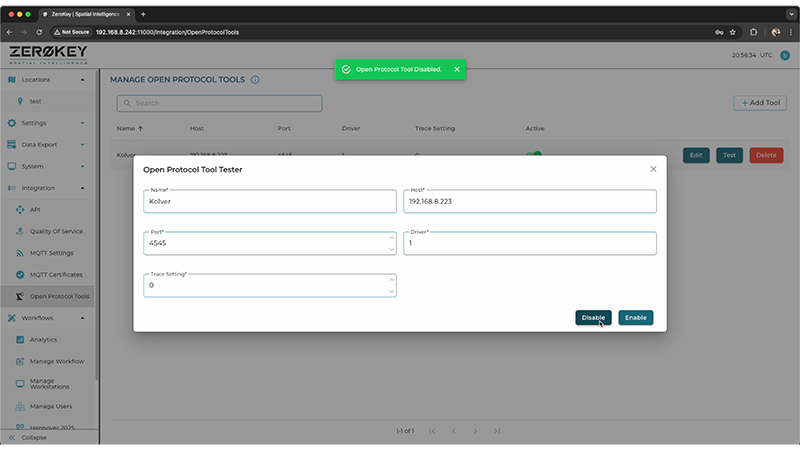
Step 6: Optional Smart Tool Integration
Connect your Torque Open Protocol smart tool to the same network as the ECD. Navigate to the Open Protocol Tools pagefrom the Integration tab in the Dashboard menu. Click “+ Add Tool”and fill inthe form with the tool’s name, IP address, and port. You can test the connection immediatelyusing the built-in test commands to lock and unlock the tool.
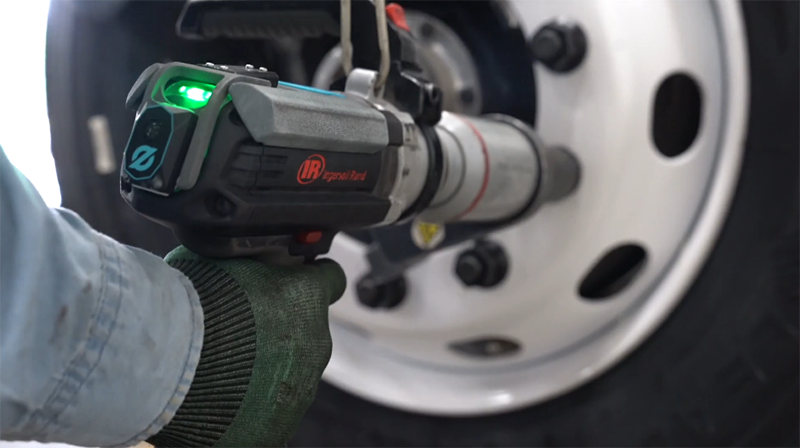
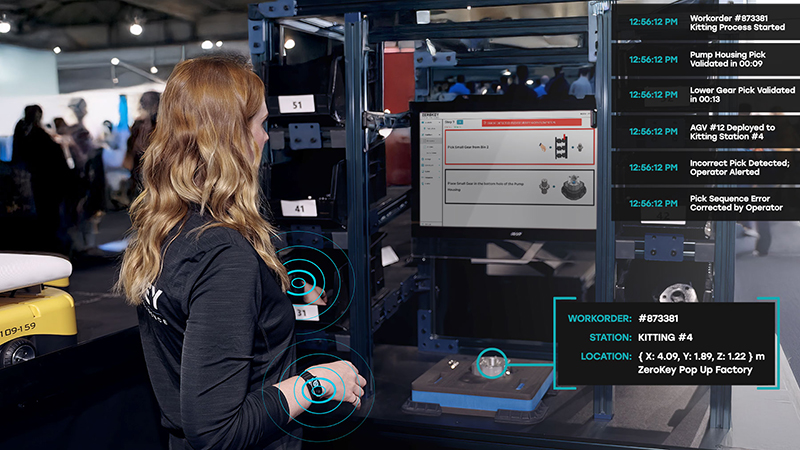
Step 7: Wristbands and Tool Tracking
Mount the QTM-UMR10 Mobile to your tool with the transducer of the Mobile centered directly over the tool head. The QTM-DWR10 is a lightweight wearable wristband that tracks the hand movements of station operators to verify manual assembly tasks, such as picking and placing parts. If required for your workflow, you canalso track things such as kitting trays, pushcarts, materials totes, or handheld tools. The ZeroKey Starter Kit includes two wristband Mobiles, two ultra-compact Mobiles for inventory tracking, and a variety of mounting accessories, cabling, and power adaptors. Device-specificCAD models and templates are also available for those who wish to create custom mounting attachments.
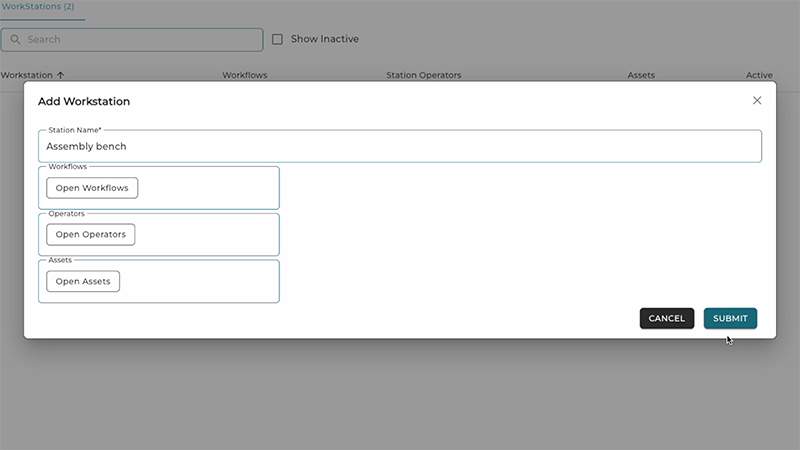
Step 8: Create a Workstation
Workstations are a physical location in your environment where a Workflow will take place, such as an assembly bench or station. Workflows can be assigned to one or more Workstations, offering scalability and flexibility to apply standardized procedures to multiple locations where work may be completed. Navigate to the Manage Workstations page from the Workflows tab in the Dashboard menu.Click “+ Add Workstation” and fill in the form with theidentifying information of your Workstation.
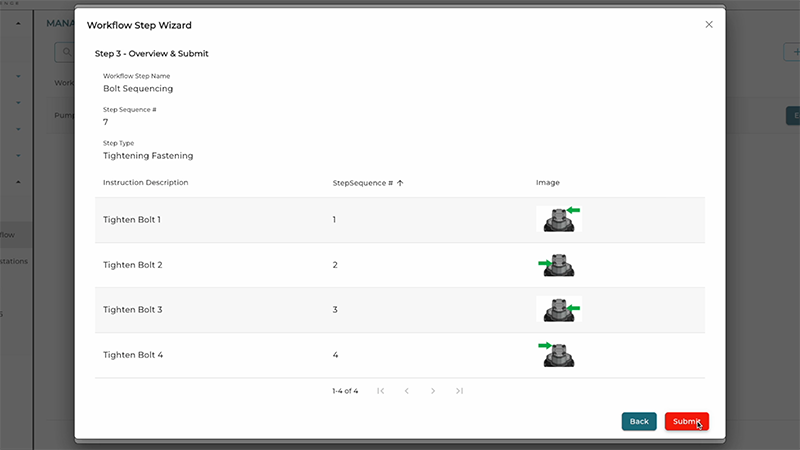
Step 9: Create a Workflow
Workflows are digital instructions for standardized procedures that involve physical actions such as picking parts, assembling components, tightening fasteners, or moving materials. For each step, you can upload an image, add descriptive text, and define external actions such as an API call upon completion.Navigate to the Manage Workflows page from the Workflows tab in the Dashboard menu. Click “+ Add Workflow” and enter a unique name and description.To add a step to the Workflow, click “+ Add Step” and enter the instruction text and an image.
Step 10: Calibrate Workstation
In the Manage Workstations page, click “Edit” to open the Workflow Assignment Tool. Open the Workflows tab and drag the Workflow you just created into the Assigned Workflows column to link it to the station. Once a Workflow is assigned to a Workstation, it must be calibrated, essentially ‘training’ the system on how each step is expected to occur. Follow the steps in the Calibration Wizard to create 3D geofenced zones throughout the workspace, which will drive the digital process tracking for each step as work progresses.
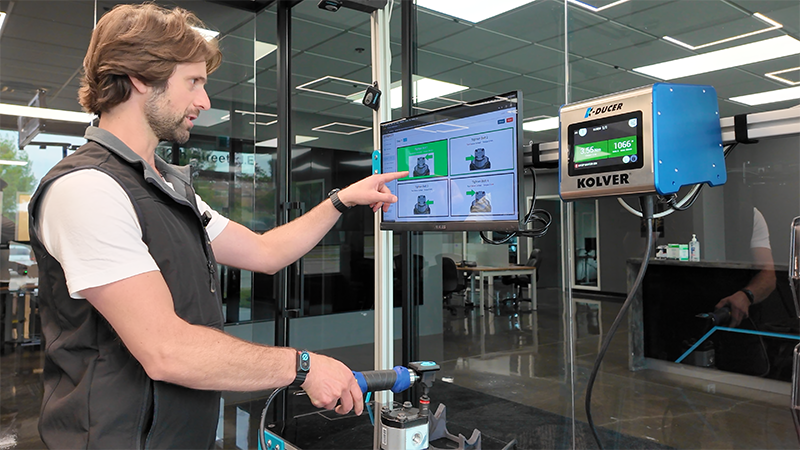
Step 11: Execute and Validate the Workflow
To begin, open the Workstation Operations page from the Workflows tab in the Dashboard menu, and select your Workflow.The onscreen instructions will load and advance in real-time as each step is completed. The system will also track step times and ensure accuracy by only advancing the instructions when a step is completed correctly. In the Workflow Calibration Wizard, optional alerts can be configured to display onscreen messages or external notifications if errors are detected. If a smart tool is integrated, it will be automatically locked out until it’s placed on the correct bolt in the sequencing process.
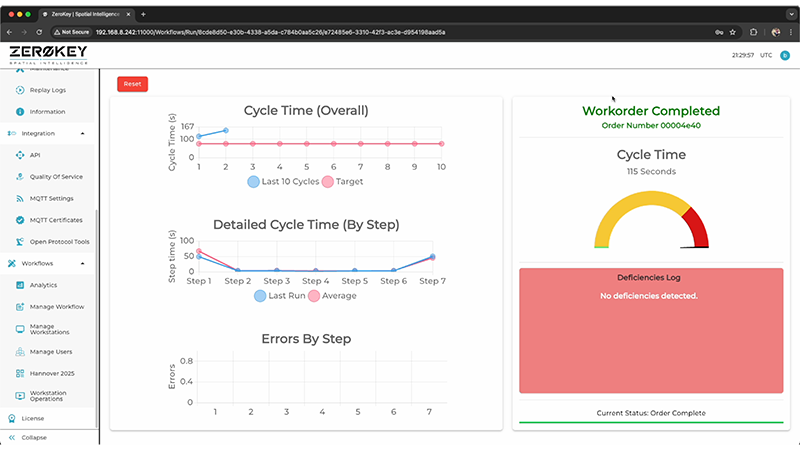
Step 12: Analysis and Optimization
Upon completion, detailed analytics about cycle time, step accuracy, and any logged deficiencies are immediately available for review. All Workflow completion data is retained, enabling process optimization across entire organizations. To access the data, navigate to the Analytics page under the Workflows tab in the Dashboard menu, and select your Workflow.
ZeroKey makes digital transformation in manufacturing not just possible, but practical and fast. In under an hour, you can convert a physical workflow at a standard workbench into a fully digitized, tracked, and validated process, with no specialized skills or experience. Best of all? This isn’t limited to a single process or station. The ZeroKey system can be scaled to as many Workflows and Workstations as needed.
The future of factory automation is here, and it’s easier than ever to build.